Echo - Standby - Creating Standby Requests
This article will cover how to send a Standby request.
To start, click the “New Standby Request” button:

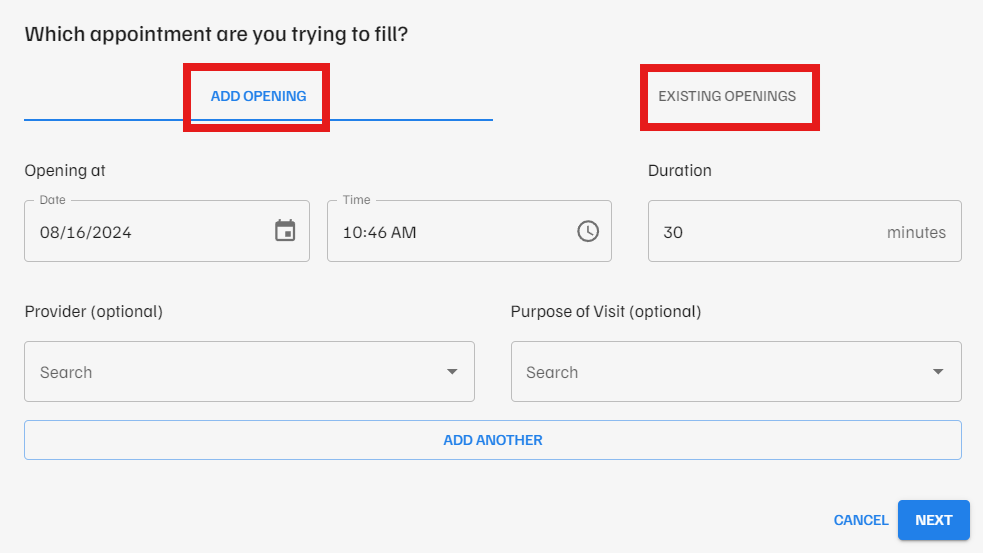
Now you can manually add a time and date for the request using the custom fields under the ADD OPENING section or you can use the EXISTING OPENINGS section to select appointment times that have recently opened up due to a reschedule or cancellation.

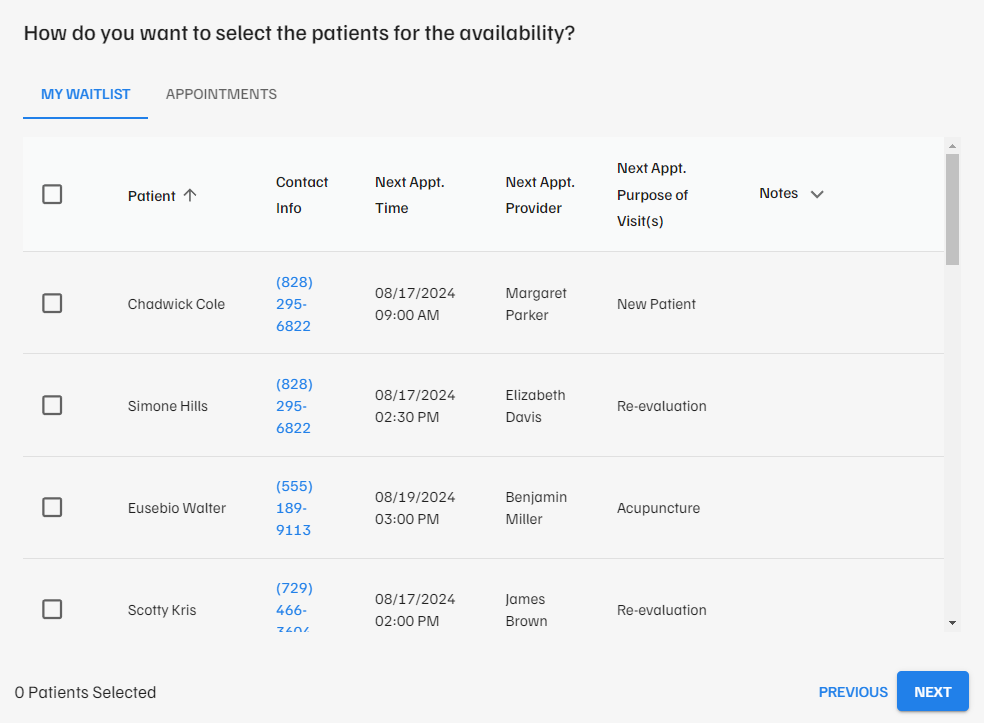
Next, you will choose how to select patients to contact from the available appointment time using “My Waitlist” or “Appointments”

Using “My Waitlist” allows you to select patients that you have manually added to the waitlist.
Using “Appointments” allows you to select a date range of appointments from the schedule to include, as well as selecting a patient group. You can choose up to 25 patients to include in the appointment request. When you have your patients selected and click next, you will see a summary of the request.
Once you send a request, you are taken to the request page where you can see all your Standby campaigns and their current status.
Practice users will receive notifications via email and in the dashboard each time a patient confirms availability for a Standby request.
