Echo - How to Add Images to Campaigns
Make your patient communications more engaging, more personal, or just more exciting. Follow these steps to add images to your Campaigns' messaging in Echo’s patient engagement platform.
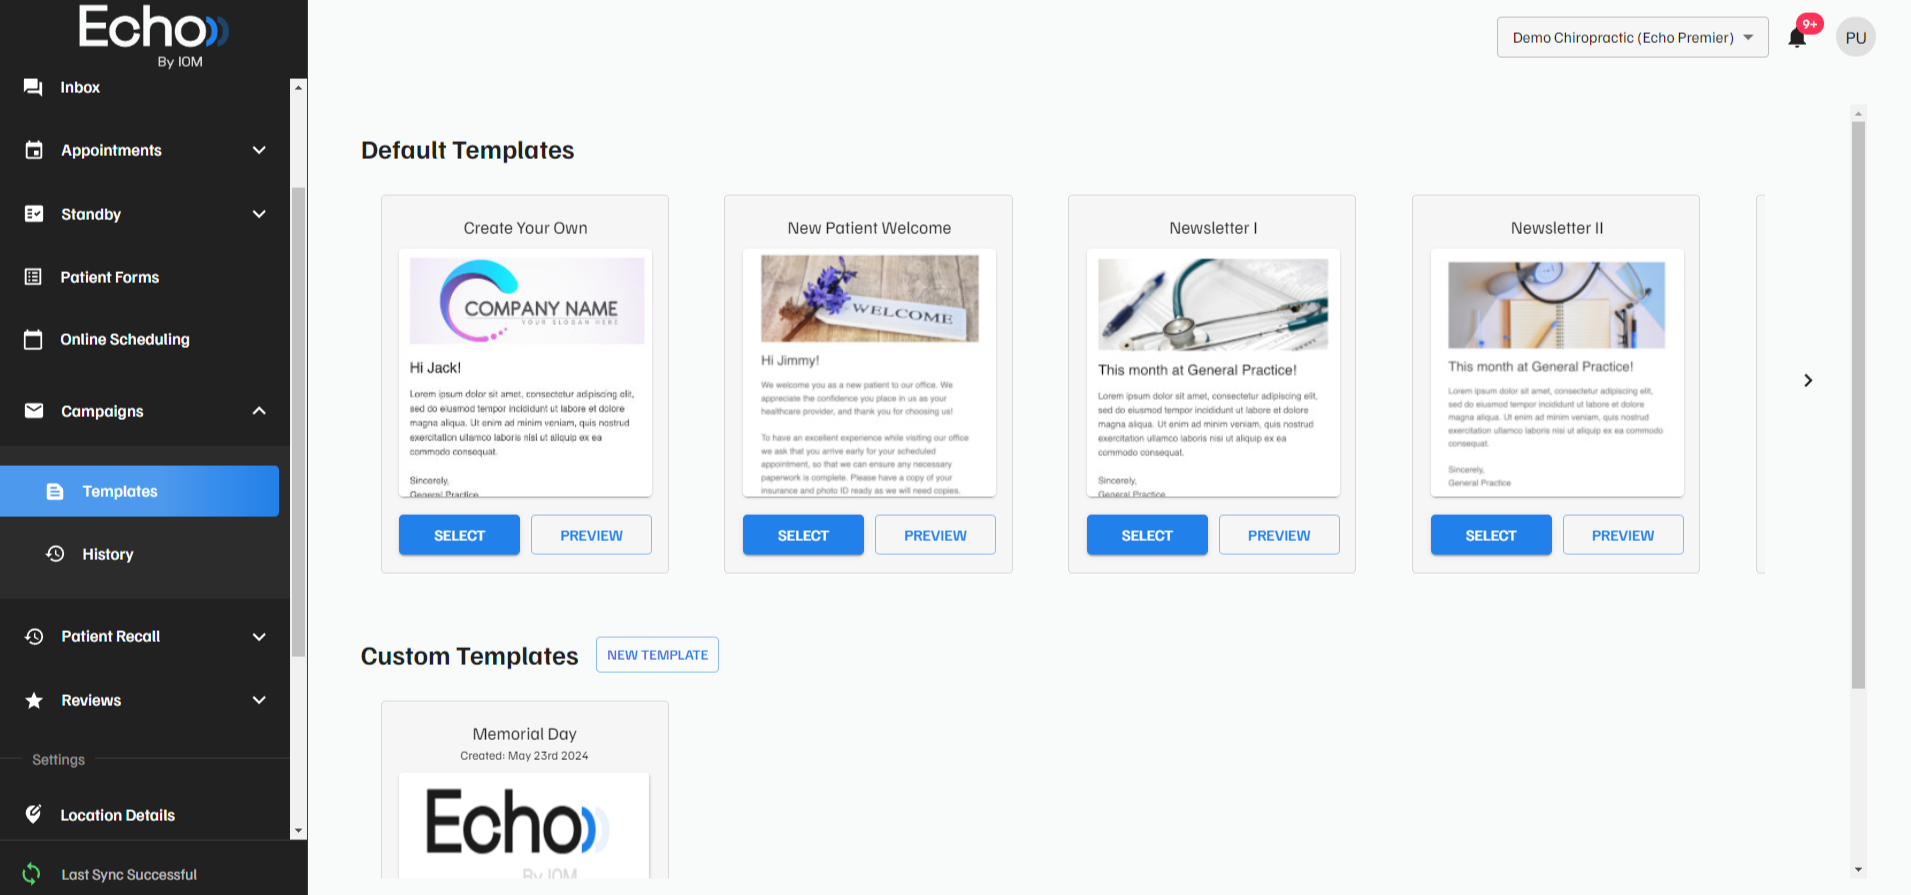
1. Select the "Templates" option under "Campaigns"
2. Select the Template you want to add images to or create a new custom template to get started.

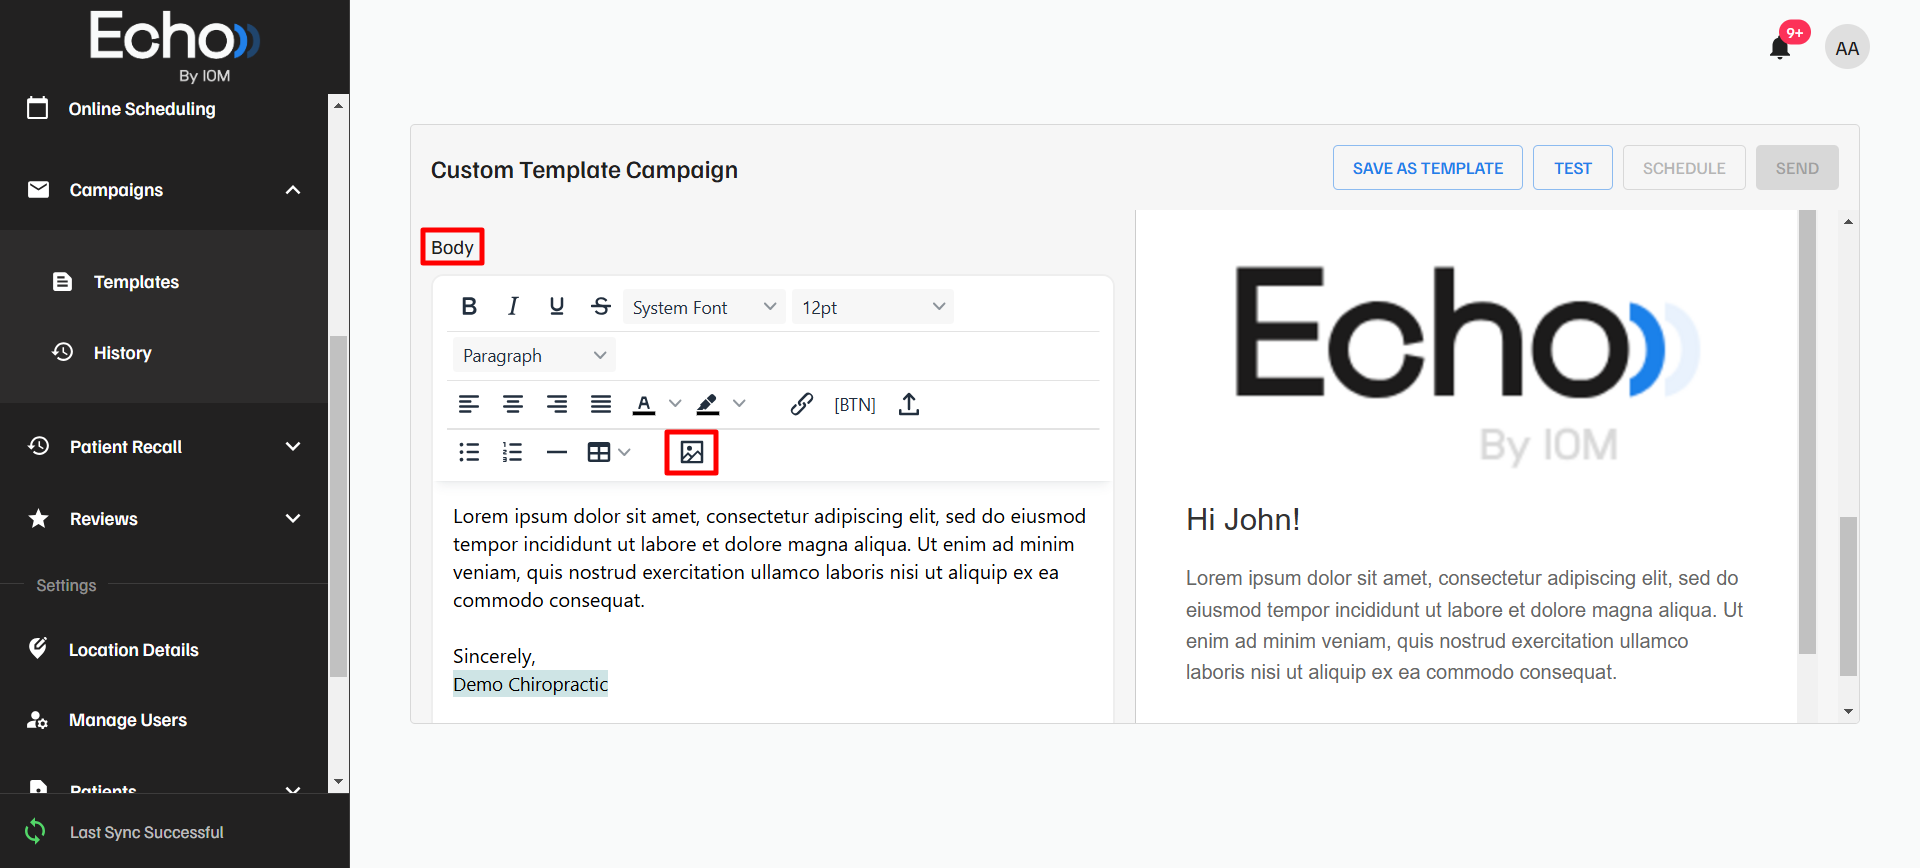
3. Scroll down to the body of the campaign and click the image icon:

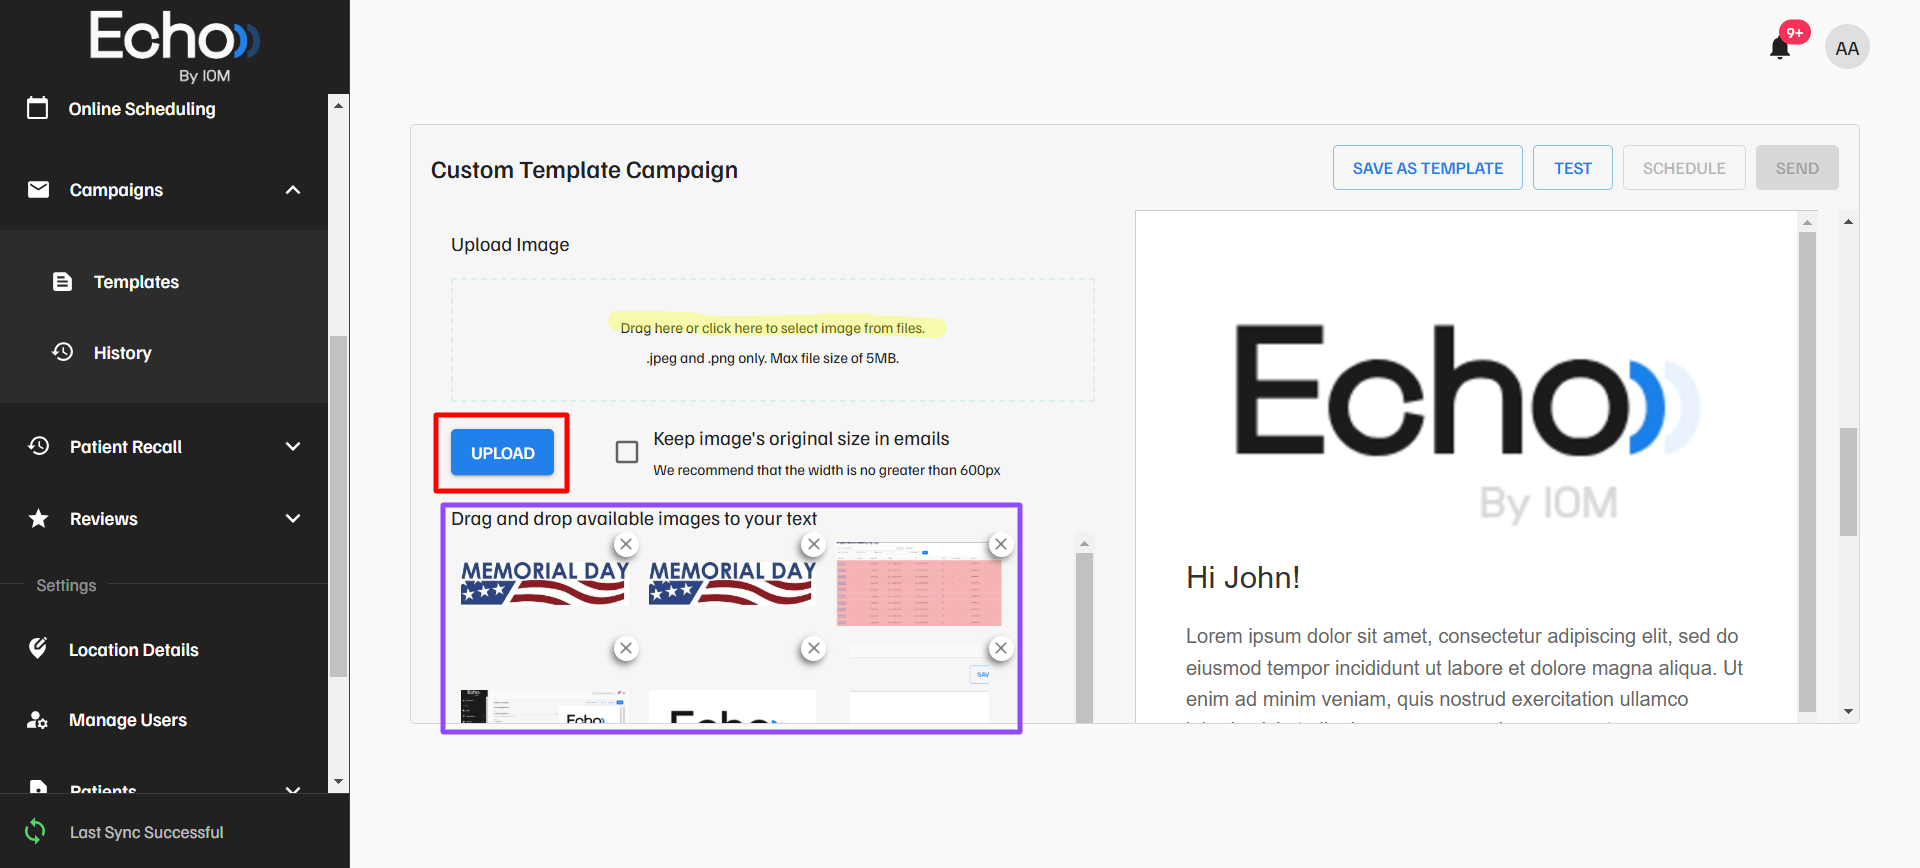
5. To upload an image to the Campaign, select UPLOAD to browse your files and find the image on your computer to add (or you can simply drag and drop the image into the yellow highlighted area. We recommend adding images that are no larger than 600px in width.
Once the image is uploaded it will populate underneath as shown in the purple box. You will then drag the images from here into the body/text of your campaign.

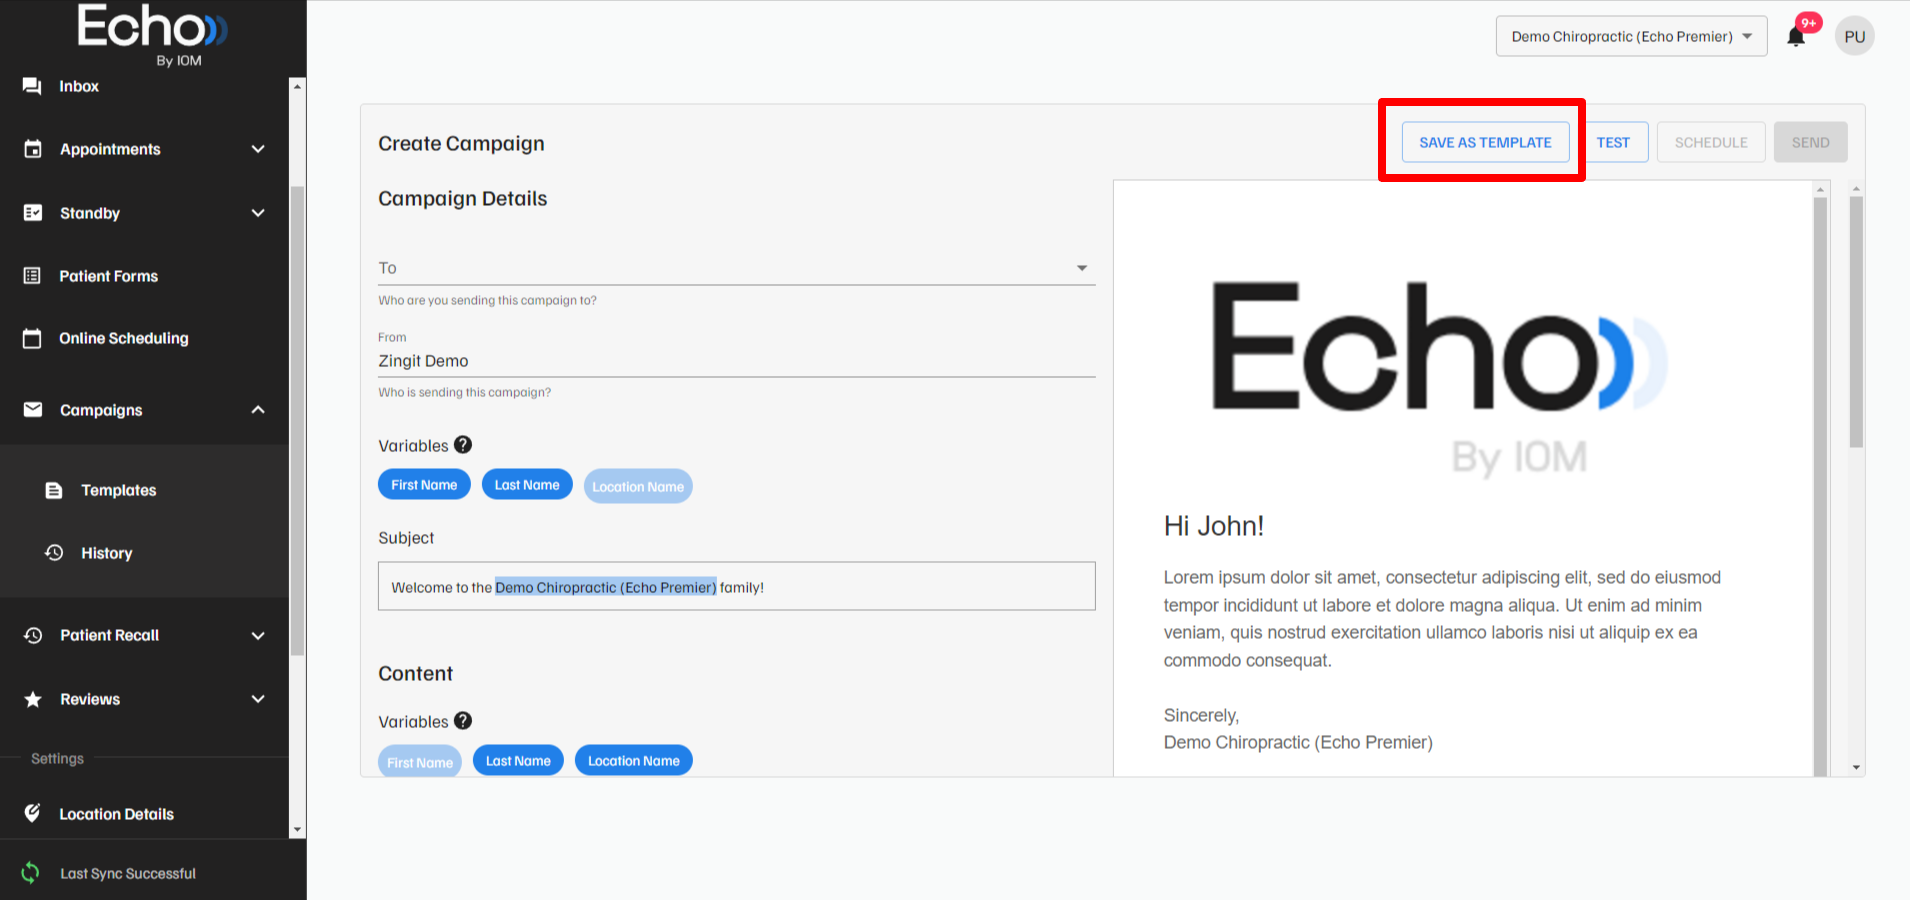
6. Save your Campaign by selecting SAVE AS TEMPLATE in the upper right portion of the screen.

It's always a good idea to test new Campaigns to see if your message looks the way you expected. You can do this by selecting TEST.
Next, you can schedule your message by selecting SCHEDULE, and send it to patients by selecting SEND.
Now, you're ready to engage your patients with unique and customized messages!
