Echo User Guide - Online Scheduling
How Online Scheduling Works
The online scheduling widget allows your patients to request appointments at their desired date and time directly on your website. After your staff approves the request in Echo, the patient is sent a confirmation email. Echo uses the integration with your EHR to display available time slots on the widget calendar in real-time. This feature provides access to the Online Scheduling section in Echo where you’ll be able to customize the widget and manage appointment requests. All the information you need to get started is available in this user guide!
*Writing new patients and confirmed appointments to the EHR is available for users with ChiroTouch (server-based version), Platinum (API version), Eclipse (server-based version), and Genesis. Please contact support@inceptiononlinemarketing.com if you are interested in using the writeback automation, as an update may be required.*
Pick A Topic To Learn More!
Accessing Online Scheduling
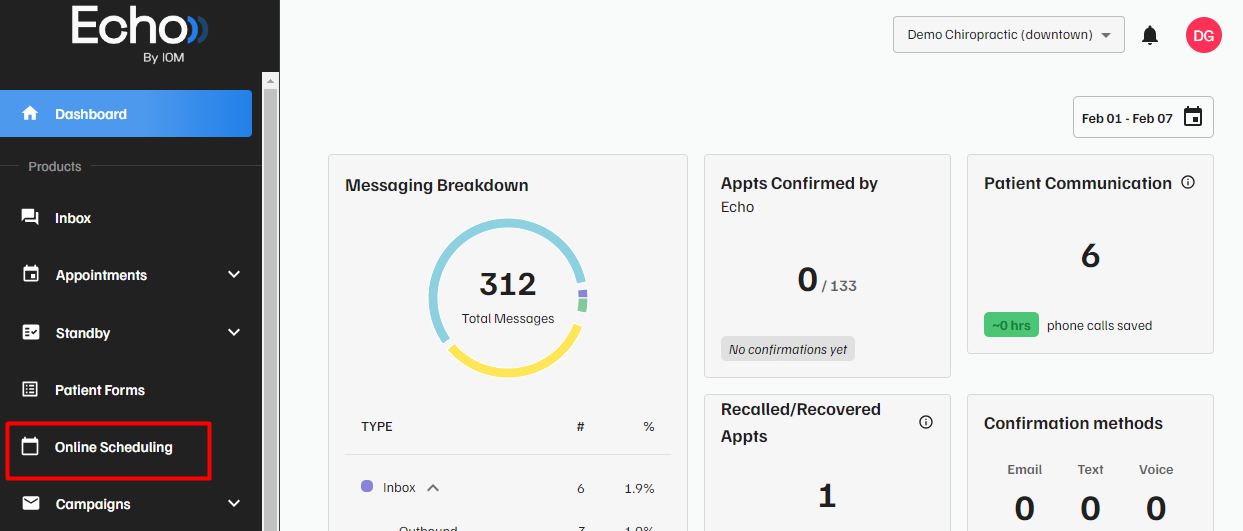
To access Online Scheduling, select the Online Scheduling tab on the left side of your Echo account:
Setup Process
Widget Customization
To begin customizing the online scheduling widget, you will want to select Widget Settings in the top right corner of the page.

Helpful Tip: If you hover over a button, a pop-up description of the feature will appear for most items.
Location Hours
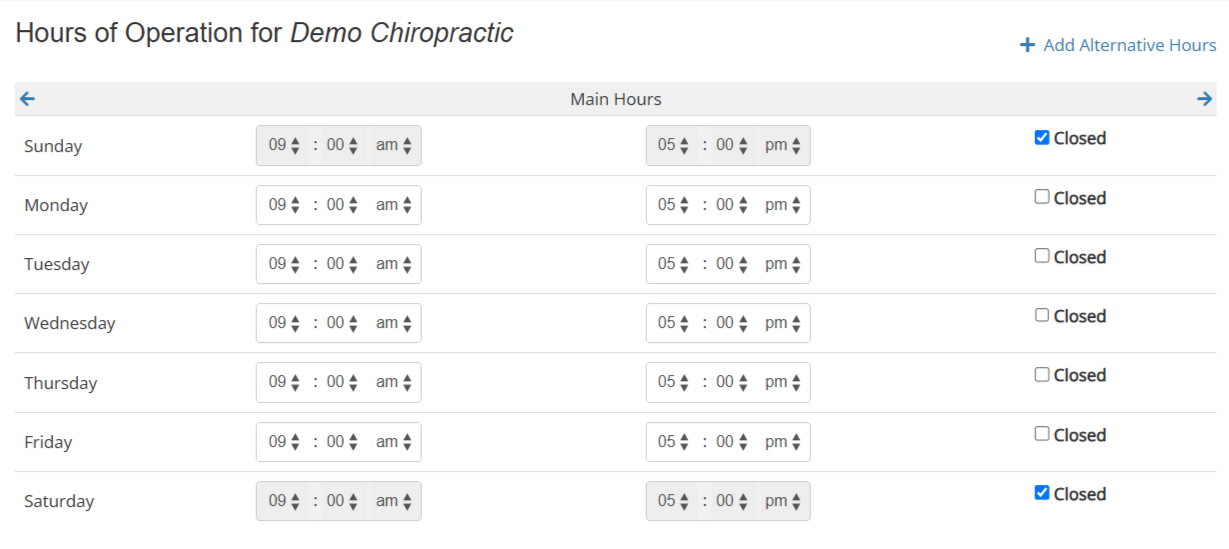
It is important to configure your office’s specific open and closed hours so that the online scheduling widget displays accurate options. There is the option to indicate that the office is closed for an entire day.
Adding Alternative Hours
Alternative hours for specific services can be set using the Add Alternative Hours button above your location hours. This feature is useful if there are certain services that are only offered on specific days or times.
Resources
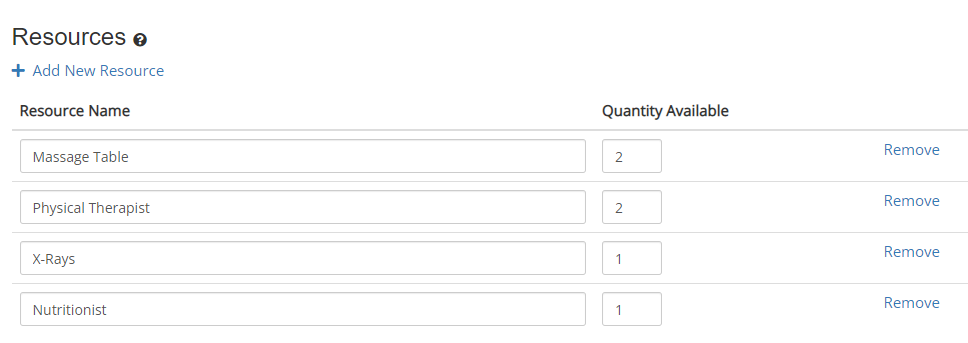
Resources allows you to control the availability of rooms or resources in your office. These resources are then tied to specific services you create, ensuring that these resources are not overbooked.
Adding Services
Services are the specific types of appointments your patients will be able to book on the widget. There is no limit to how many services you can add. Some users will opt to only have certain services available, such as new patient appointments, while others will choose to provide all offerings to patients.
To add a new service, select Services at the top of the settings and then click on Add Service.

Service Name: The name of the service that will display on the scheduling widget.
Mapped Service (*exclusive to accounts with writeback): A drop-down menu that displays the appointment types pulled from your EHR/practice management software. Tying the service to a specific appointment type will allow for the appointment requests to be written correctly to your schedule. New appointment types will be synced to the list after the first appointment with the new appointment type is created on your calendar.
Note: Mapping services is not required for Eclipse users since all bookings will be hard-coded to the New Patient appointment type in Eclipse.
Service Description: A short description of the service that will display on the scheduling widget. This can be filled out for more in-depth or uncommon services. Some services, such as adjustments, are self-explanatory.
Session Duration & Price: Allows you to display the duration for the service in minutes and the pricing if standardized. You do have the option to hide either one or both.
Form: If your office is using our forms, the existing forms will display in the drop-down menu, and each can be assigned to a specific service! That means that after an appointment with a form tied to the service is confirmed, the patient will be emailed the form associated with that service. If you are not using our forms yet, contact support@inceptiononlinemarketing.com for more information!
Resources: Resources created in the Hours/Locations tab can be assigned to specific services.
Overrides: These are settings that can be modified for the specific service in question. The settings used here will be unique to this service and not apply to the others. This is useful for scenarios such as a service with alternative hours. The default booking settings will be used for all services unless specifically modified in the overrides section.
Advanced: Like the overrides, these settings are unique to the service in question. The color-coding option is for internal use to group services together. You can hide a service from the patient-facing scheduling widget here if you want to make it unavailable temporarily. Another feature is the ability to select a start and end date for a service, which is useful if a service is being offered for a limited time.
Managing Services
After a service is created, all services will display under the Manage Your Services section. You will be able to do things such as:
- Edit the settings/configuration of the specific service
- Duplicate the service to use as a template for similar services
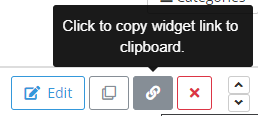
- Copy the direct URL link for the service to send to patients
- Remove the service entirely
- Change the order of the services displayed on the scheduling widget.

Categories
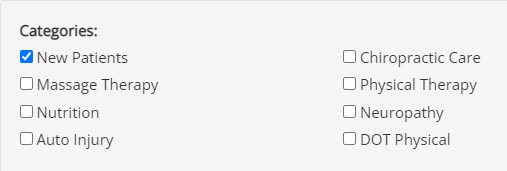
Services can be grouped together into categories on the scheduling widget. Each category can have a name, short description, and even have a picture attached as an icon. After a patient selects the category they are looking to book, the services tied to the category will display. Creating categories is not required, some offices prefer to have all services displayed together.

After a category has been created, you can tie a service to a category by going to the Services tab and selecting Edit on a service. Under Basic Info, you can select from the list of categories at the bottom.
Booking Settings
Located under the Settings tab, this section allows you to edit the settings used for booking across all services. The most important setting you will want to configure is selecting your local time zone. This will ensure that the time displayed on the scheduling widget will align with your calendar.
Another important setting to decide is if you want to allow your patients to be able to request same-day appointments. If same day bookings are permitted, there is also a setting to decide how much notice is required in order to book.
An additional setting to highlight is the optional “fake it until you make it” setting. This allows the calendar to appear moderately or super busy when patients go to request an appointment. Seeing a limited number of options could create a sense of urgency for the patient to book their appointment as soon as possible.

Cancellation Settings
Located under the Settings tab, this section is where you will add your office’s cancellation policy. This policy will be provided to patients in their confirmation email after the staff has approved an appointment request.

Other Widget Settings
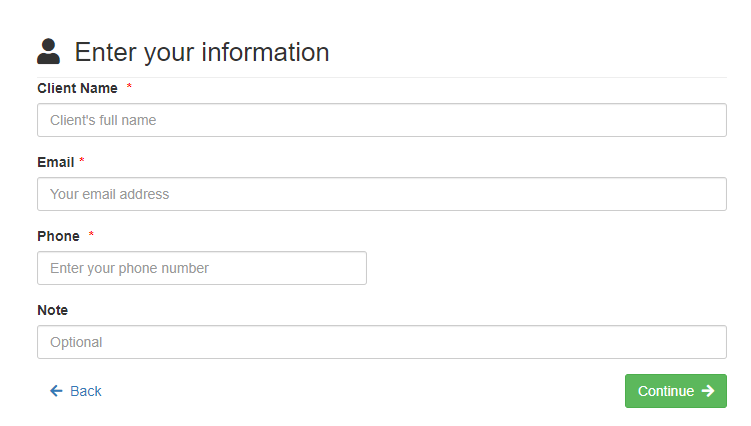
Custom Fields: This setting allows you to create custom fields during the appointment request process on the scheduling widget. This is where the patient enters their information such as their name and email.
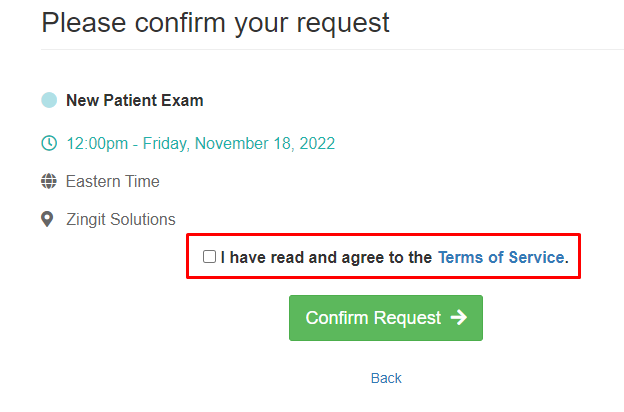
Custom Terms of Service: Before the patient confirms their appointment request, you have the option to add custom terms of service for them to read and accept.
Activation & Management
Previewing The Widget
The scheduling widget can be previewed under the Preview tab at any point during the customization process. The widget will display exactly as it will on your website, even allowing you to go through the appointment request process as if you were a patient. This helps ensure that the scheduling widget is customized properly.

Adding Widget to Website
Once the scheduling widget is fully customized, you are now able to add the widget to your website. The two different codes available and how to apply either option to your website can be found under the Widget tab. We would recommend copying the HTML codes, as well as the instructions provided, and sending those to your web designer to apply to your website. A direct link to the scheduling widget can also be found in this section, which can be added to a template in the Echo Inbox.

The scheduling widget will go live as soon as it is on your website and patients will be able to start requesting appointments!
Managing Appointment Requests
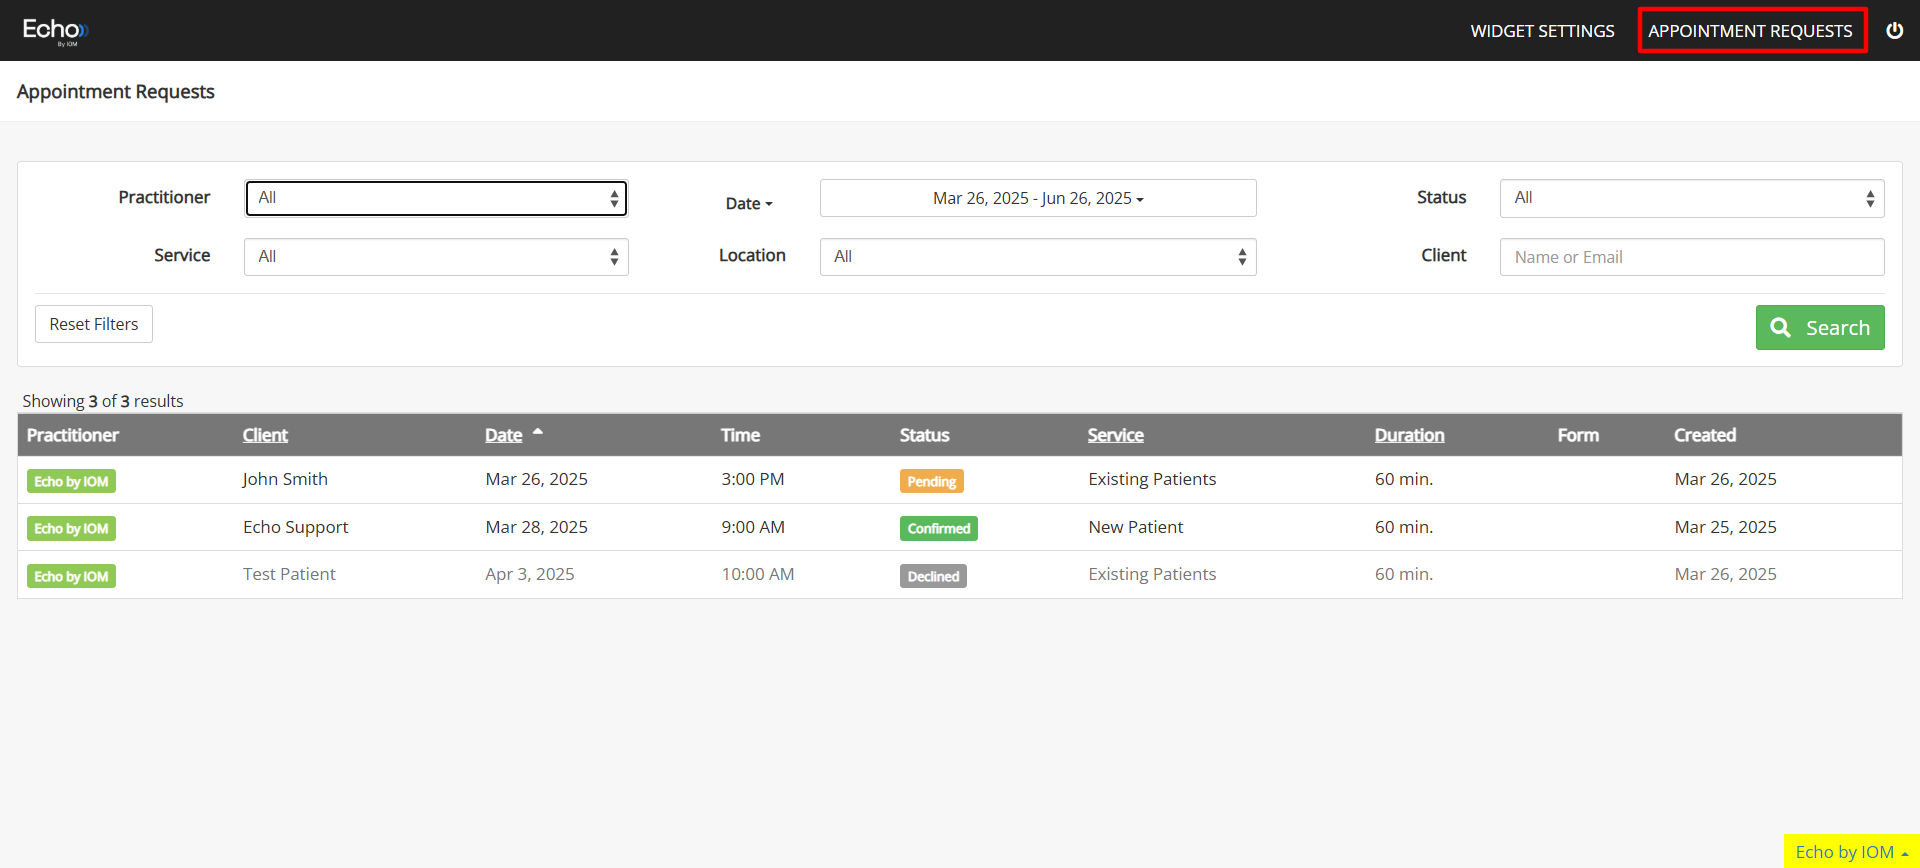
When a patient requests an appointment using the scheduling widget, your office will be sent a notification email, and the request will appear in the Appointment Requests Dashboard under Appointment Requests.
Approving Requests
When a request is made, the status of the appointment will display as pending.

To approve or decline the request, click on the request, and select either option. You will be given the option to send a message to the patient in an email for either selection.
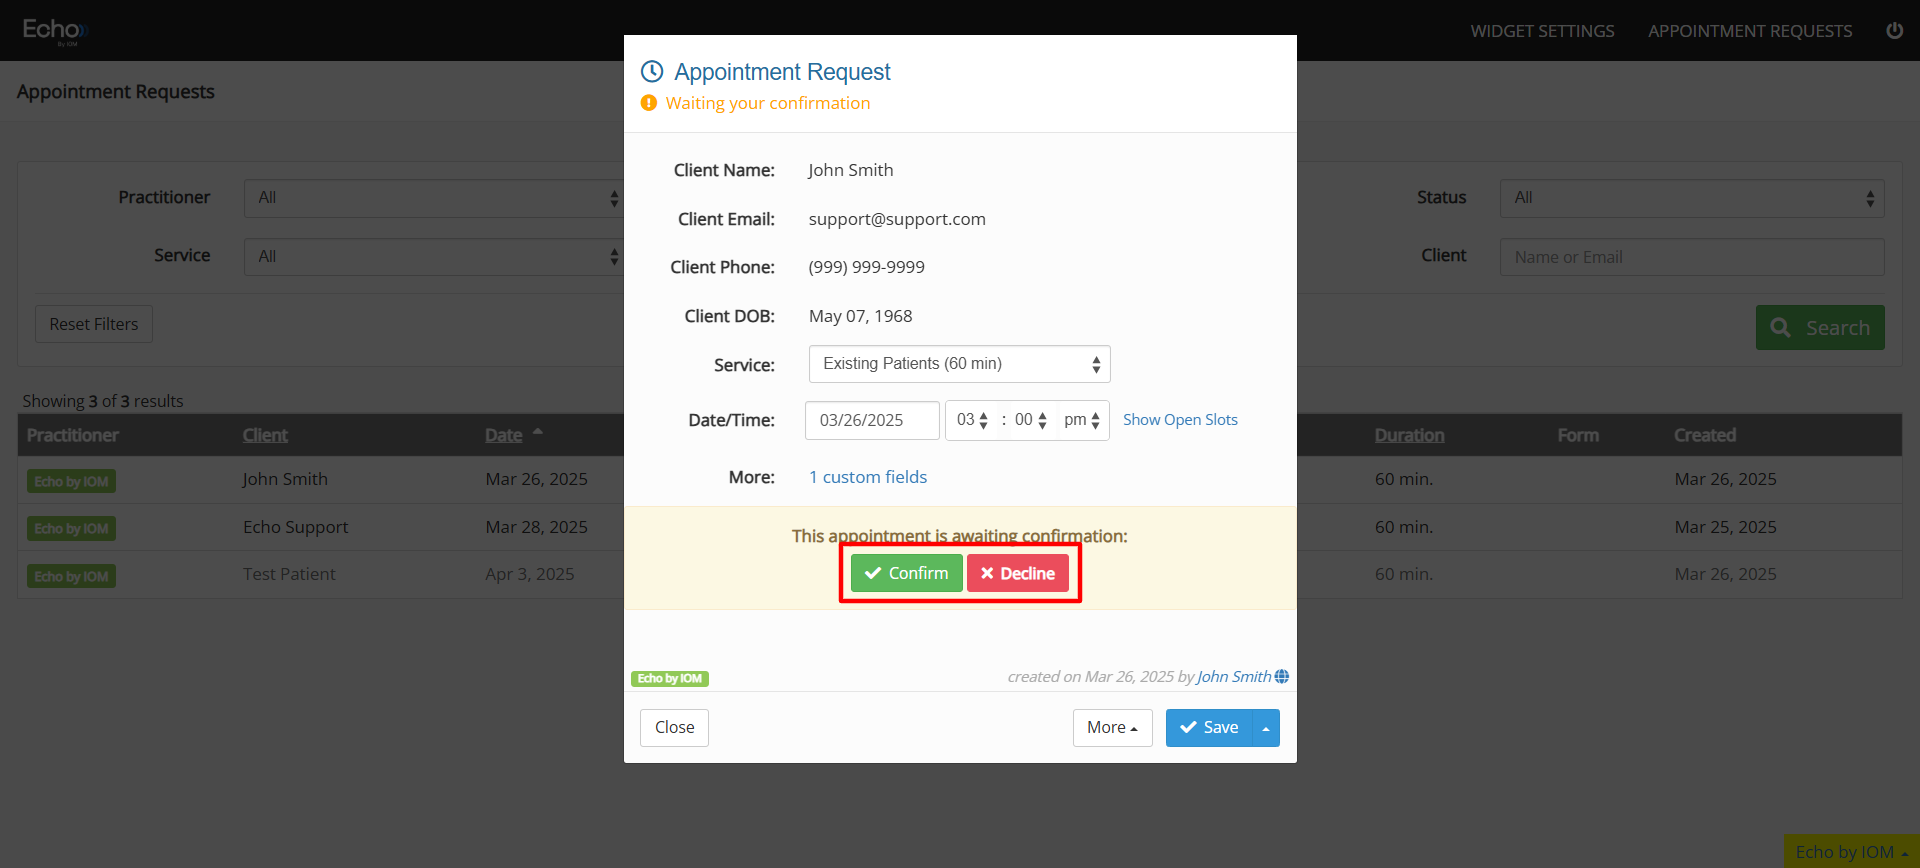
After the request is confirmed, the patient will be sent a confirmation email with the appointment details.
*Exclusive to users with writeback: Before an appointment is written back to your EHR calendar, the request must be approved by the staff. This is helpful for last minute changes not yet reflected on the EHR calendar, such as an unexpected closure, and to prevent fake requests from being added to your calendar. For new patient appointment requests, a new patient record will also be created in your EHR.
Appointment Request Records
All previous requests submitted through the scheduling widget will be available to review for your records. Requests can be filtered by services, date range, confirmation status, or you can search by name/email.
Questions & Support
If you have any questions regarding the online scheduling widget not covered in this guide or any feedback, please contact us at support@inceptiononlinemarketing.com
